The interview management area in Ontrack Staff Hub gives you a central place to create, view, and manage interview slots. It brings together scheduling tools, search options, and learner‑booking visibility so you can organise interviews efficiently across your institution.
With interview management, you can:
-
Access a dedicated landing page showing all interview slots.
-
Use role‑based permissions to ensure the right people can manage bookings.
-
Search and filter interview slots.
-
Create single or recurring interview slots.
-
Edit, duplicate, and delete slots.
-
See which learners are booked.
-
Move directly into concierge to view and manage attendees.
Dashboard
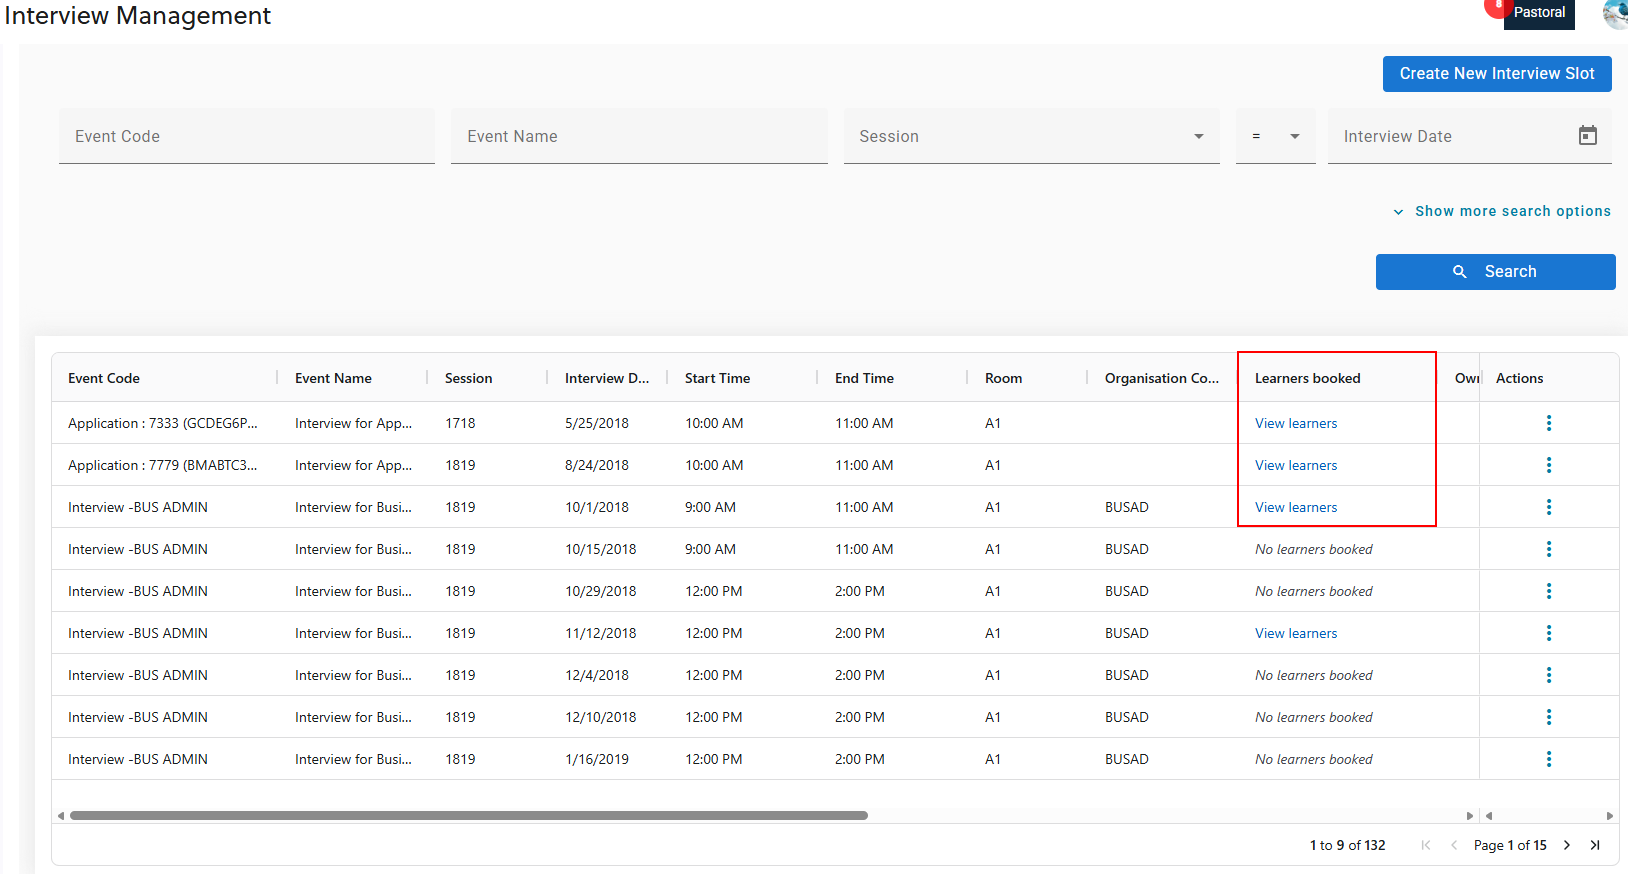
The dashboard acts as your main workspace. Here, you can see every interview slot that has been created and use filters to narrow down what you need. You can filter by options such as event details, session, date, and more detailed search criteria.
Each slot shows essential information, including timings, room, event data, organisation details, notes, and booking limits. This gives you a clear overview of upcoming interviews.
From the dashboard or the slot details panel, you can see whether learners are booked. If learners are allocated, a link takes you straight to the interview details page in concierge, where you can see full attendee information, as shown in the image below.
Interview slots
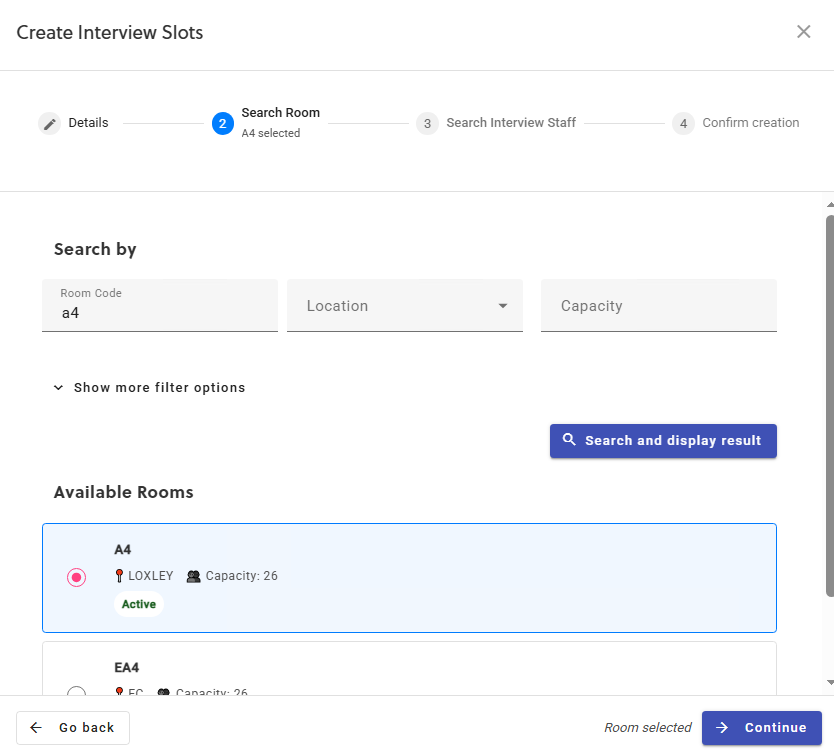
If you have permission to create slots, you’ll use a guided four‑step process as follows:
-
Details – Provide the key information, such as event details, interview date, start and end times, and the maximum number of learners.
-
Room selection – Search for and choose an available room.
-
Interview staff selection – Add one or more staff members to the slot, although this step is optional.
-
Confirmation – Review all the information before creating the slot.
For example, the image below shows the second step of the interview slot creation process, with a room search being performed.
Once you confirm the details, the new slot appears immediately on the dashboard. If you need to set up several interviews at once, you can create recurring slots. You choose a pattern, that is daily, weekly, or monthly, and set either an end date or a number of occurrences. Before you complete the process, you’ll see a summary of the recurrence pattern so you can confirm the schedule is correct.
Actions
After an interview slot has been created you can take the following actions:
- View and edit interview slots
-
When you open a slot, it appears in a side panel. You can switch between:
-
-
View Mode, where all details are read‑only.
-
Edit Mode, where you can change the information, if you have permission.
-
-
If learners are already booked onto the slot, EBS Ontrack Staff Hub protects certain scheduling fields, such as date and time, so you can’t change them in a way that disrupts existing bookings.
-
Duplicate interview slots
-
If you want to create a similar slot, you can duplicate an existing one. The form opens with the original details already filled in, and you can adjust anything that needs changing before saving.
All create, edit, and duplicate actions follow your institution’s allow clashes setting. If clashes aren’t allowed and your slot conflicts with another, interview management will show an error.
-
Delete interview slots
-
If you have the delete role, you can remove interview slots directly from the dashboard when they’re no longer needed.
-
Allow booking control
-
Each slot includes an allow booking setting. When this option is turned on, learners and staff can book into the slot. You can set this during creation or adjust it when editing. The current setting is always visible in the dashboard.
Concierge integration
You can manage learners directly in concierge, including removing learners from interviews when needed. This keeps all interview‑related activity connected and easy to navigate.